

A Quilt From Our Studio - Broken Lone Star
Posted by Christy Dillon on 8th Jan 2017
This Broken Lone Star raffle quilt was made by a member of Cloth Peddler's in Stephens City, VA that I (Christy Sr) quilted. The patterns were used or redesigned from our Swirling Suzie set and are all available on the website.

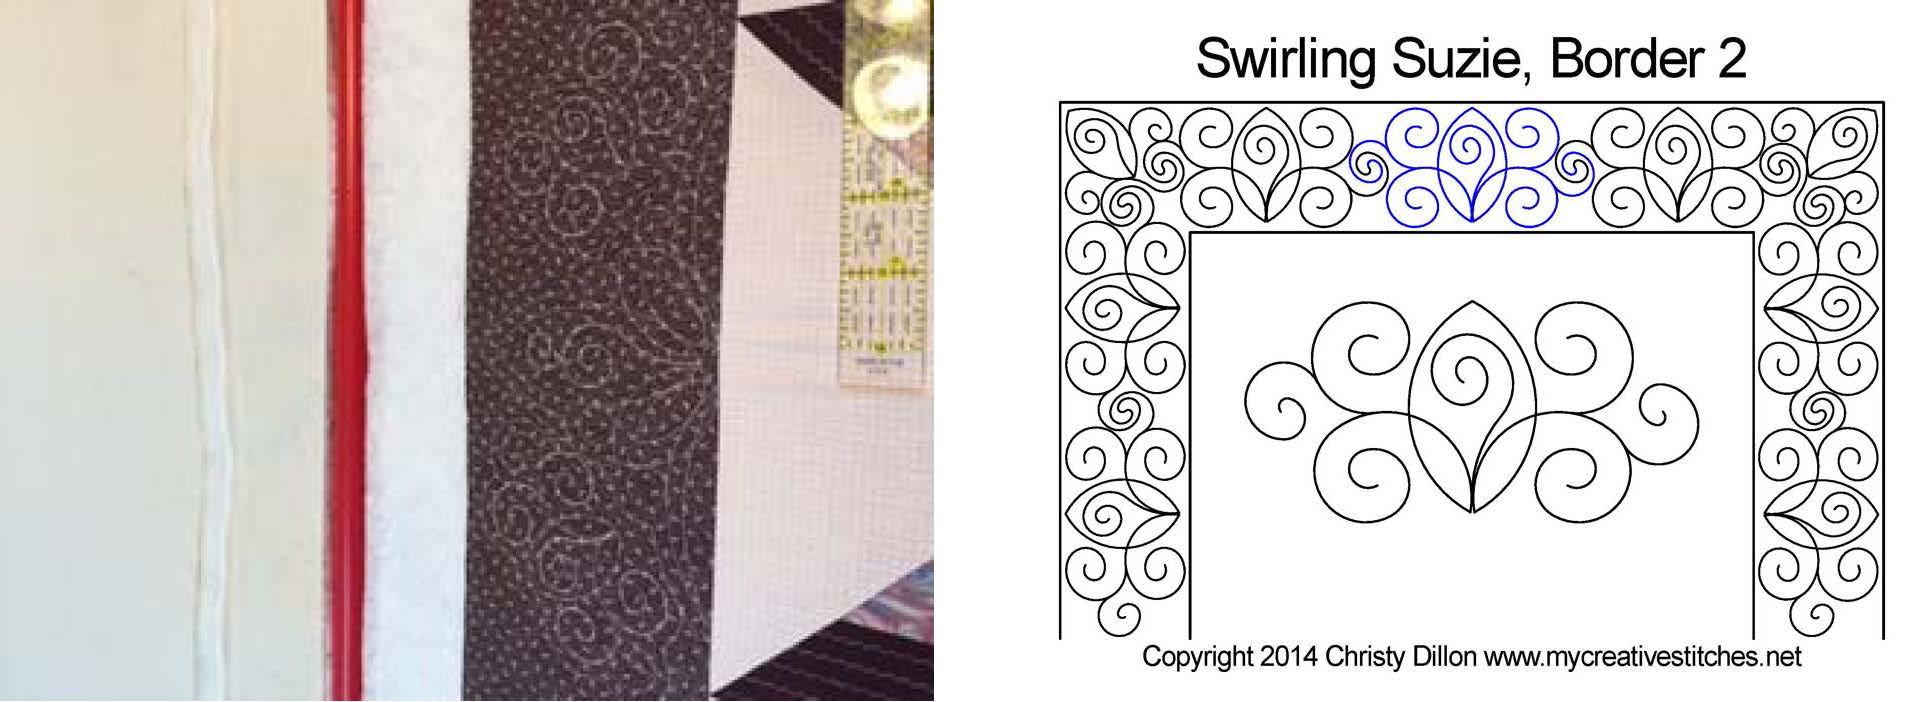
I started with the border of this quilt and redesigned a
Triangle and a Border from the Swirling Suzie set and made them into one
pattern. I used this
L Corner Pattern pattern in each of the corners. I also
designed a new block,
Swirling Suzie Block 5, and placed it in the
middle of the three broken Lone Stars. These were stitched in a
contrasting thread so that they would stand out.
I left the rest
of the border for later because I was going to quilt it in a different
color. Ultimately, I used our
Straight Line Piano Key Border in the same
color thread as the border fabric.
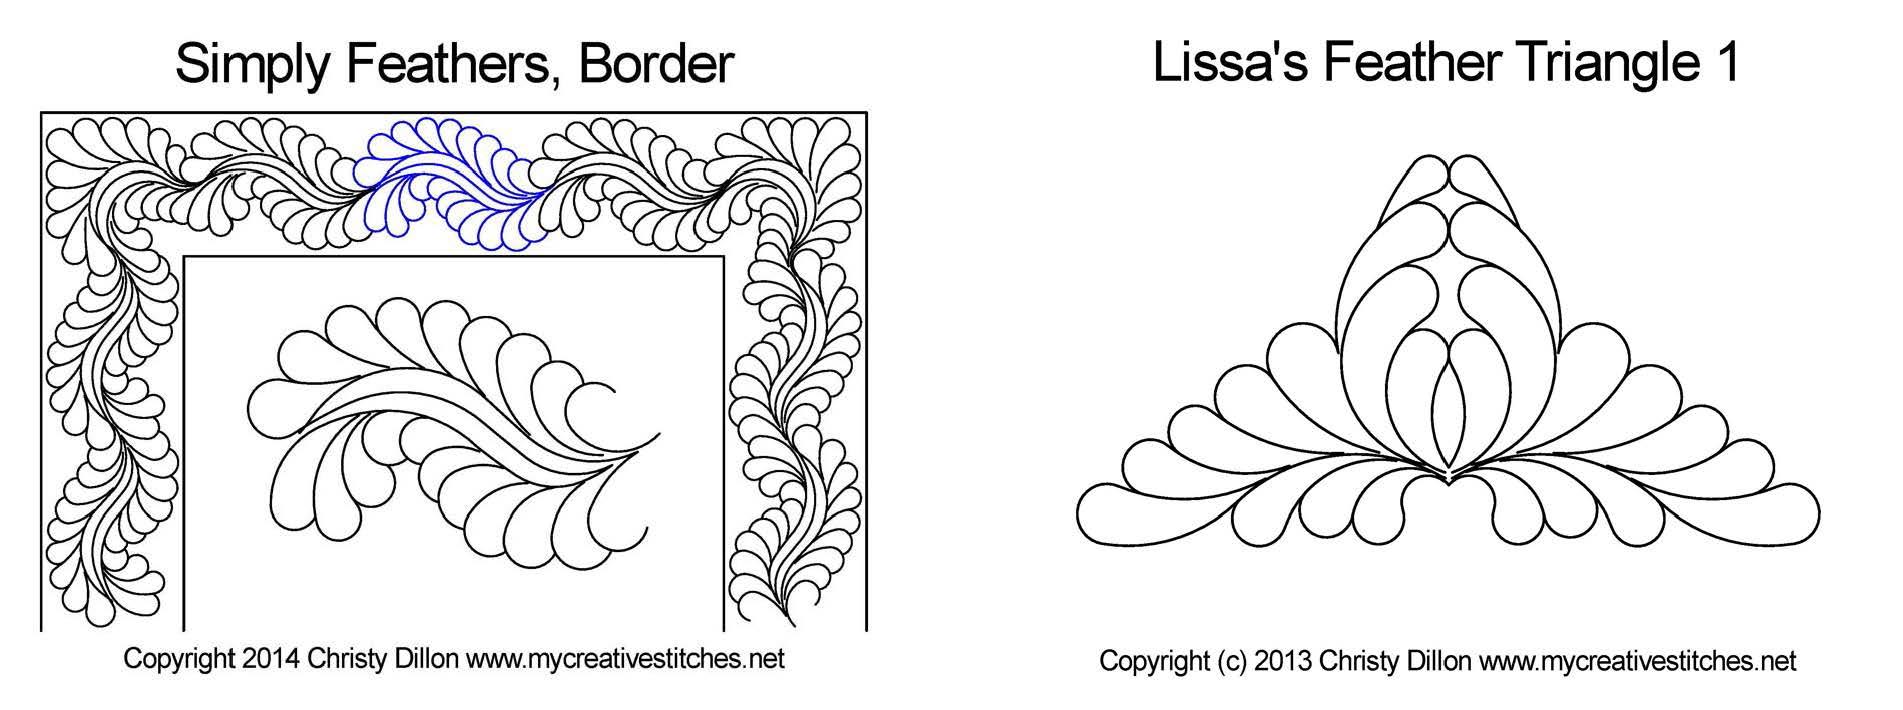
Next I quilted what I considered as another border that went all away around the quilt but was just triangles and squares. I used our Simply Feathers Border because it looks continuous even though the pattern was broken up between the triangles and squares. I was really happy with this choice and thought it was a gorgeous addition. Then I just worked my way down the quilt and used our Swirling Suzie Sashing on a narrow border.

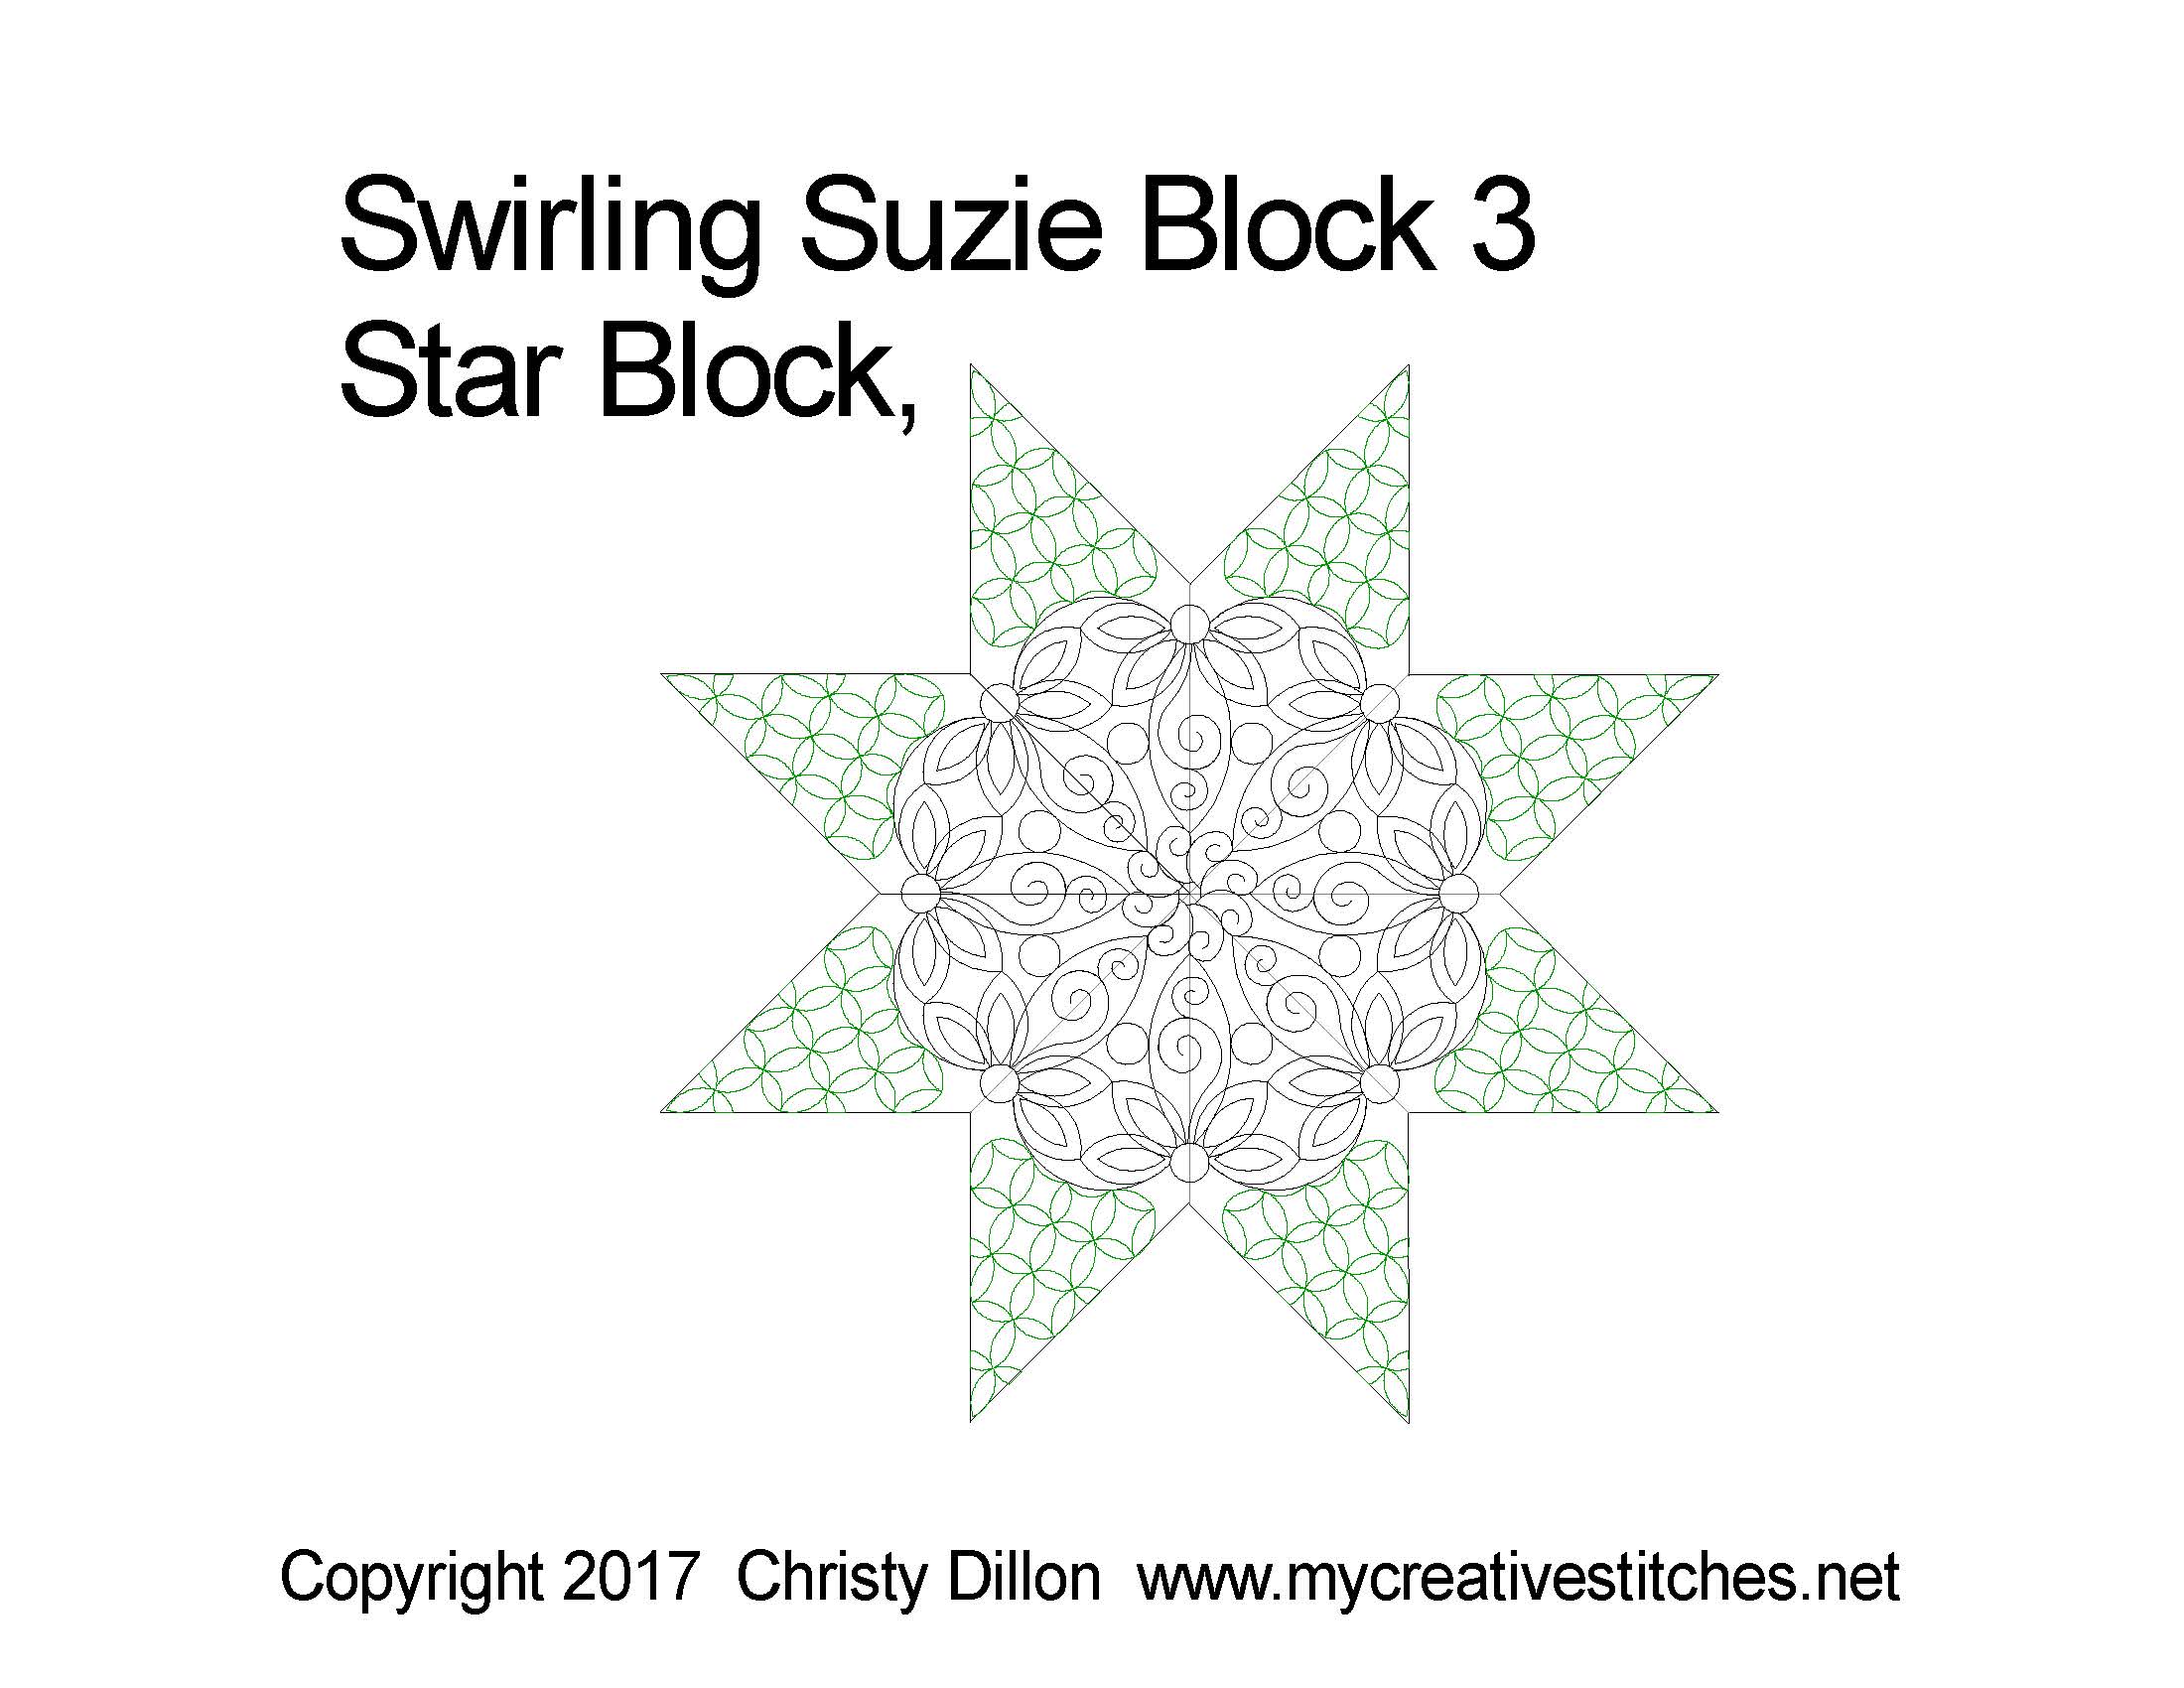
After that came the small broken stars. Since there were actually two sizes of stars, I designed two different star patterns. The smaller stars were on the outside of the quilt whereas the larger star points were on the inside of the quilt. I didn't want to use the same pattern for the larger star in the smaller star blocks because that would have made very tight quilting. As a rule of thumb, I try to keep the density of the quilting constant over the entire quilt.

Next came the Blocks and Triangles of the quilt that surrounded the inner Star - I used the Swirling Suzie Block 2 and Triangle 1 Point-to-Point from the set. However, I wanted these to stand out, so I added some echo's around the patterns. One at 0.25", one at 0.50" and the last one at 0.15" - it really added a special touch to the block and triangle. I also did a quarter inch outline around the outer edge of the square and triangle.

Then came the Large Diamonds - and the center of the star which is the large diamonds put together in a circle. I should mention that it is very easy to place the diamonds into the patterns. All you have to do is make a boundary around the outside of your pattern and then place one pattern into the top boundary. Then, highlight the pattern by clicking on the pattern to make it turn pink (or the purple handles, for gammills). All other machines follow your own instructions - then, right click on the pattern, scroll down until you see "circular array", another screen will appear, and ask for " Number of Copies___ at Degrees ____ and then you Place Array Center Point. At this point you will place the mouse in the center of the boundary. As soon as you hit the center the patterns will appear in each of the boundaries you made. Then all you have to do is adjust each one to make sure that they fit correctly and are attached to each other. Be sure to connect both patterns to each other so that they stitch out continuously as one.
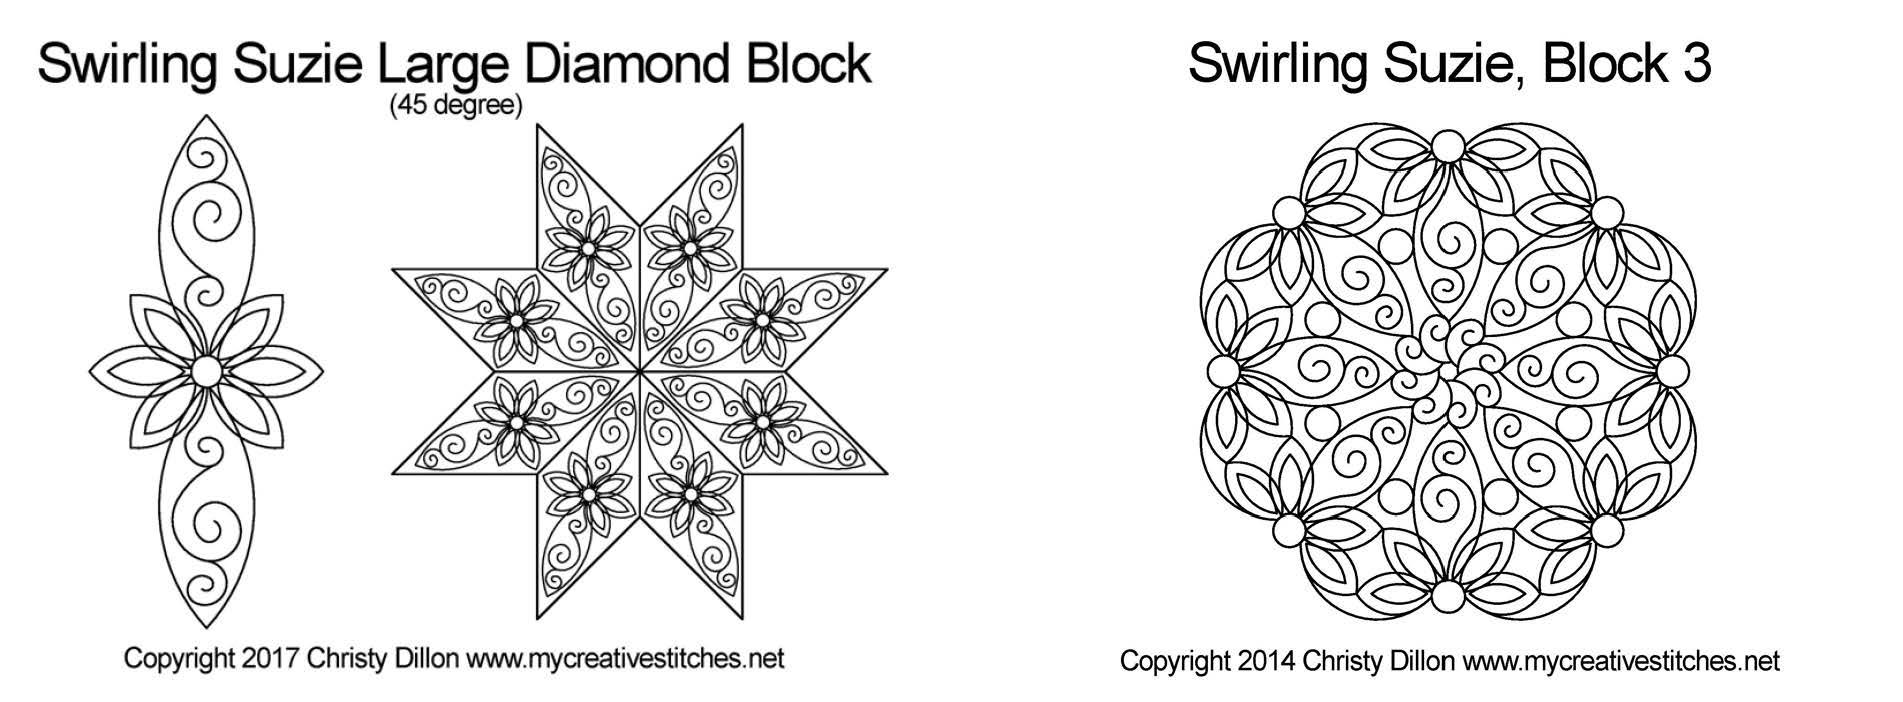
When I got to the center of the quilt I didn't want to use the same pattern as the other large diamonds - I wanted to add some additional variety. So I use another pattern, Swirling Suzie Block 3, which is a round block. It fit beautifully and gave a really unique look to the center of the star. On the outer points of the quilt I did a continuous curve, which very traditional for a Lone Star Quilt, and gives it a classic and universally appealing look.
I did the bottom half of the quilt the same as I did the top half - it went very quick for a 100 x 100 sized quilt. I think the key to making this easy was having really good patterns that were perfect for this quilt - although Christy Jr. and I are prejudiced ;)